On these pages, I’m keeping notes of my experimentation with new AI based software development tools. My goal is to understand for myself whether tools like Claude and Codex are ready for developing commercial software. Low code and zero-code tools have been around for a decade or so – this is not the same. Vibe coding has been around for a few years as well – this isn’t the same.
This new approach has various names – agentic coding, spec driven development, personally I think “intent driven development” captures it best, though I’m confident that name won’t catch on. With intent driven development – I’m responsible for the what, the AI is responsible for the how.
As the cost and time to develop software shrinks, the focus will shift to other critical elements of the product lifecycle. I believe the next areas of differentiation for builder / product organizations will be:
- Choosing hard problems to solve and solving them in ways that delight users. The easy problems can now be easily solved with a few well authored prompts and a vibe coding platform. Vibe Coding is incredible for solving small local problems – it’s the new Excel (and I mean that with a huge amount of respect)
- Accelerating all the other toil related to building and product – pricing, training, marketing, enablement
- Convincing enough people that your solution to the problem is the best. As time to market collapses, you have to assume competition and cheap imitation will be rife – how do you stand out ?
And so it is with my little pet project. I’ve invested 6.5 hours in the development of the application – included in that is some overhead in getting the development environment setup (GitHub automation, local Xcode), design, development and building regression test harnesses. For fun, I did a little costing analysis on the main code repo using scc – clearly COCOMO hasn’t really kept up with even pre-AI development tools but it’s a good way to reason about the magnitude in productivity – 8 months compressed to a week – even if the COCOMO estimate is out by a factor of 10 – the point still stands.
───────────────────────────────────────────────────────────────────────────────Language Files Lines Blanks Comments Code Complexity───────────────────────────────────────────────────────────────────────────────TypeScript 65 8,455 681 302 7,472 796SVG 24 281 9 0 272 0JSON 8 192 4 0 188 0Swift 4 211 24 35 152 16CSS 3 388 50 11 327 0JavaScript 2 49 1 2 46 3HTML 1 17 1 0 16 0Markdown 1 22 9 0 13 0───────────────────────────────────────────────────────────────────────────────Total 108 9,615 779 350 8,486 815───────────────────────────────────────────────────────────────────────────────Estimated Cost to Develop (organic) $725,251Estimated Schedule Effort (organic) 8.18 monthsEstimated People Required (organic) 2.77───────────────────────────────────────────────────────────────────────────────Processed 467665 bytes, 0.468 megabytes (SI)───────────────────────────────────────────────────────────────────────────────
But that’s not really the point of this post. In my humble opinion, software development for low-stakes, greenfield problems are largely solved at this point and development time and cost is collapsing – it’s hard to debate this any longer and I personally don’t require any convincing. I don’t see an imminent plateau either – even if the models are throttled – agentic development can still scale in other ways. The way we develop software – heavily augmented with AI and human as the designer / orchestrator – that’s the way – there’s no going back.
So on to the next bottleneck – that’s pretty much everything upstream and downstream of software development. Software development is the tip of the spear in terms of agentic augmentation and performance improvement – everything else is next.
I spent a few frustrating hours this week downstream – fighting with the Apple TestFlight review process – clearly the user-centric design and detail to attention that Apple products are known for is pretty much absent from their developer tooling. I won’t belabor the point here but it’s classic “toil” – work that has to happen but brings you no joy at all. But it does highlight the point about the whole product lifecycle – everything has to get leaner and faster – it’s not going to be acceptable to wait three days for an App Store approval if the app only took a day or two to develop. You can’t spend a month on a marketing plan for a new release if the release will be out in two weeks. Everything has to speed up.
As part of the early access stage for my little test app – I needed an onboarding process. I could have used the Apple TestFlight defaults but want to own the onboarding and capture some user information in the process so I pretty much single-shotted a simple website (hosted on GitHub pages) and setup a Google form to capture registrations – not as automated as I’d hoped but mostly a one time cost.
Now I have the simple web presence – I have a home for the app’s change log so I got Claude to create an Action to create release notes every time I push a new release. The only twist here is that the Action calls out to Anthropic to turn PR text into human readable release notes – so far It seems to work well.
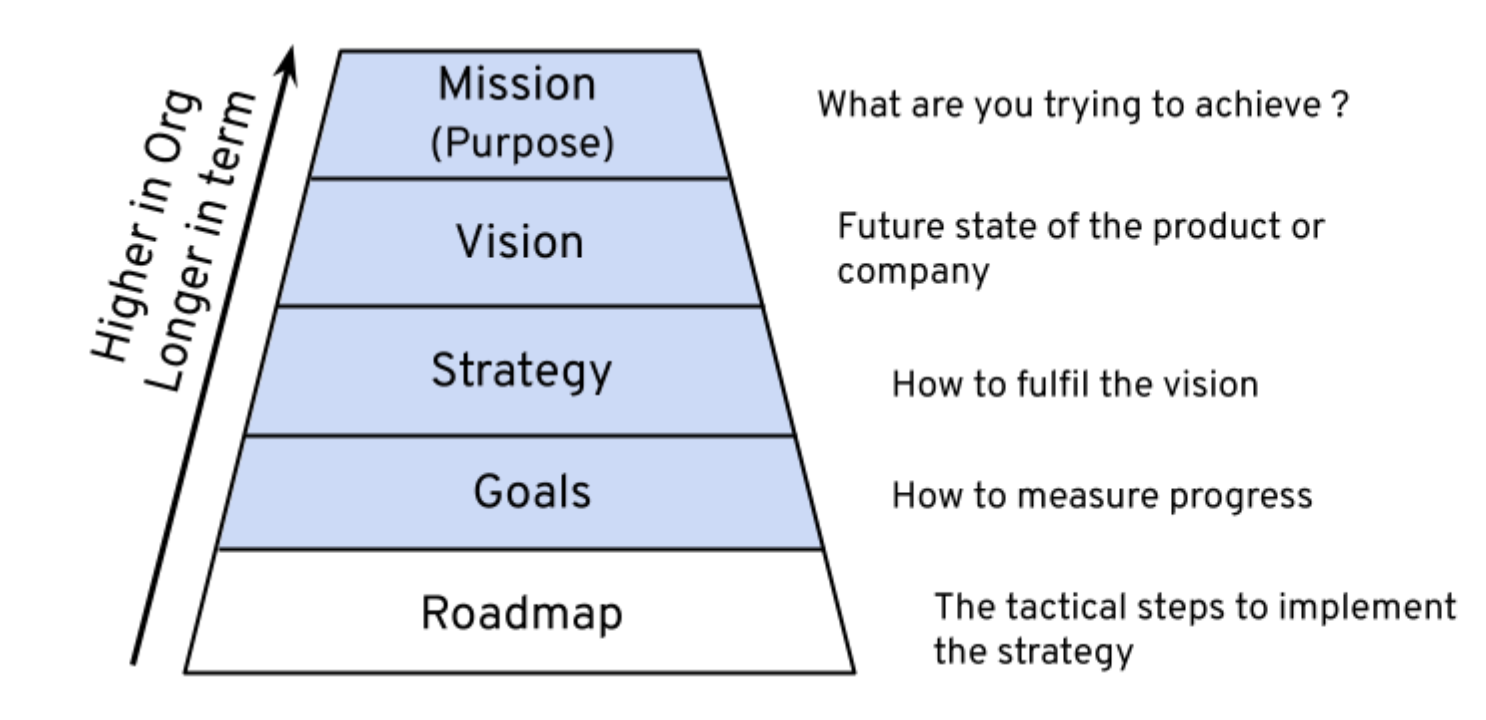
How we think about planning and project management will have to change. Even for a small one man project – normally there would be some planning involved but what I’ve learned this week is that if you have time to write a GitHub issue or a Jira ticket, then you probably have time to “do the thing” you were going to write the ticket about. What kind of planning is eve required in world of constant feature delivery – all you really need is direction / themes and prioritization.
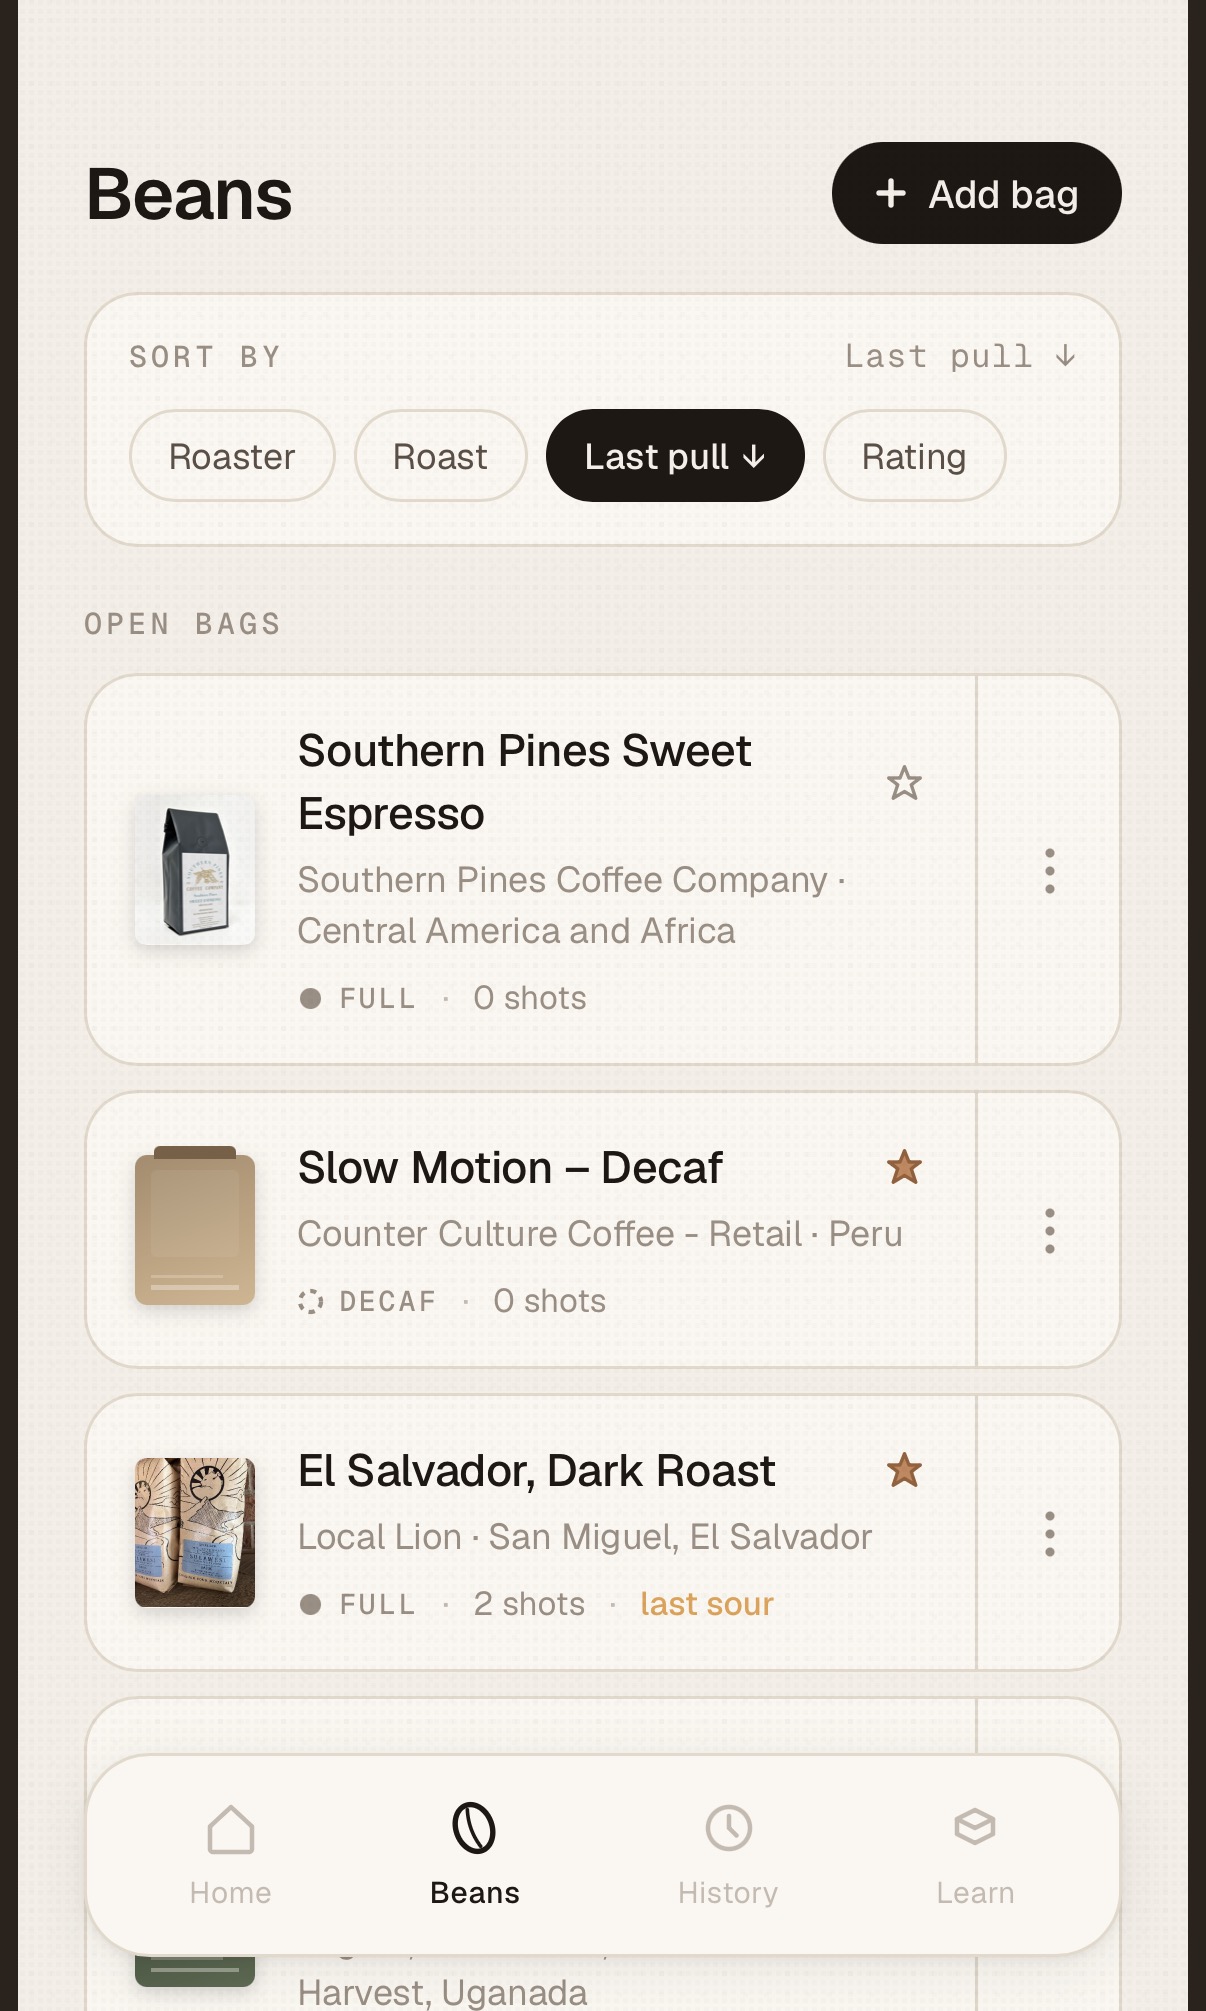
The next thing I’m thinking about is how to take this experiment further – I have the first batch of beta users (you can sign up here if there are still slots available) and I expect to get some feedback – I’m hoping I can largely cut myself out of the loop. My goal is for Claude (or whatever) to present the work planned for the next release (new features, bug fixes, tech debt) based on customer feedback and product analytics – let me review it then just get on with the implementation, testing and delivery. Self improving software / products / systems with human defined policy and guardrails – that’s where were heading. Sure someone still needs to inject strategy and innovation into the loop but product maintenance and improvement can be largely automated.
Diary of an Agentic Wrangler (part 4)
On these pages, I’m keeping notes of my experimentation with new AI based software development tools. My goal is to understand for myself whether tools like Claude and Codex are ready for developing commercial software. Low code and zero-code tools have been around for a decade or so – this is not the same. Vibe…
Diary of an agentic wrangler (Part 3)
FWIW – my day job is running a largish (28 people) Product and Design team for Cellebrite. Cellebrite has nothing to do with Espresso – though some of the offices do have decent machines. I’ve been leading product teams for over 20 years and that background is driving how I develop software with Claude. For…
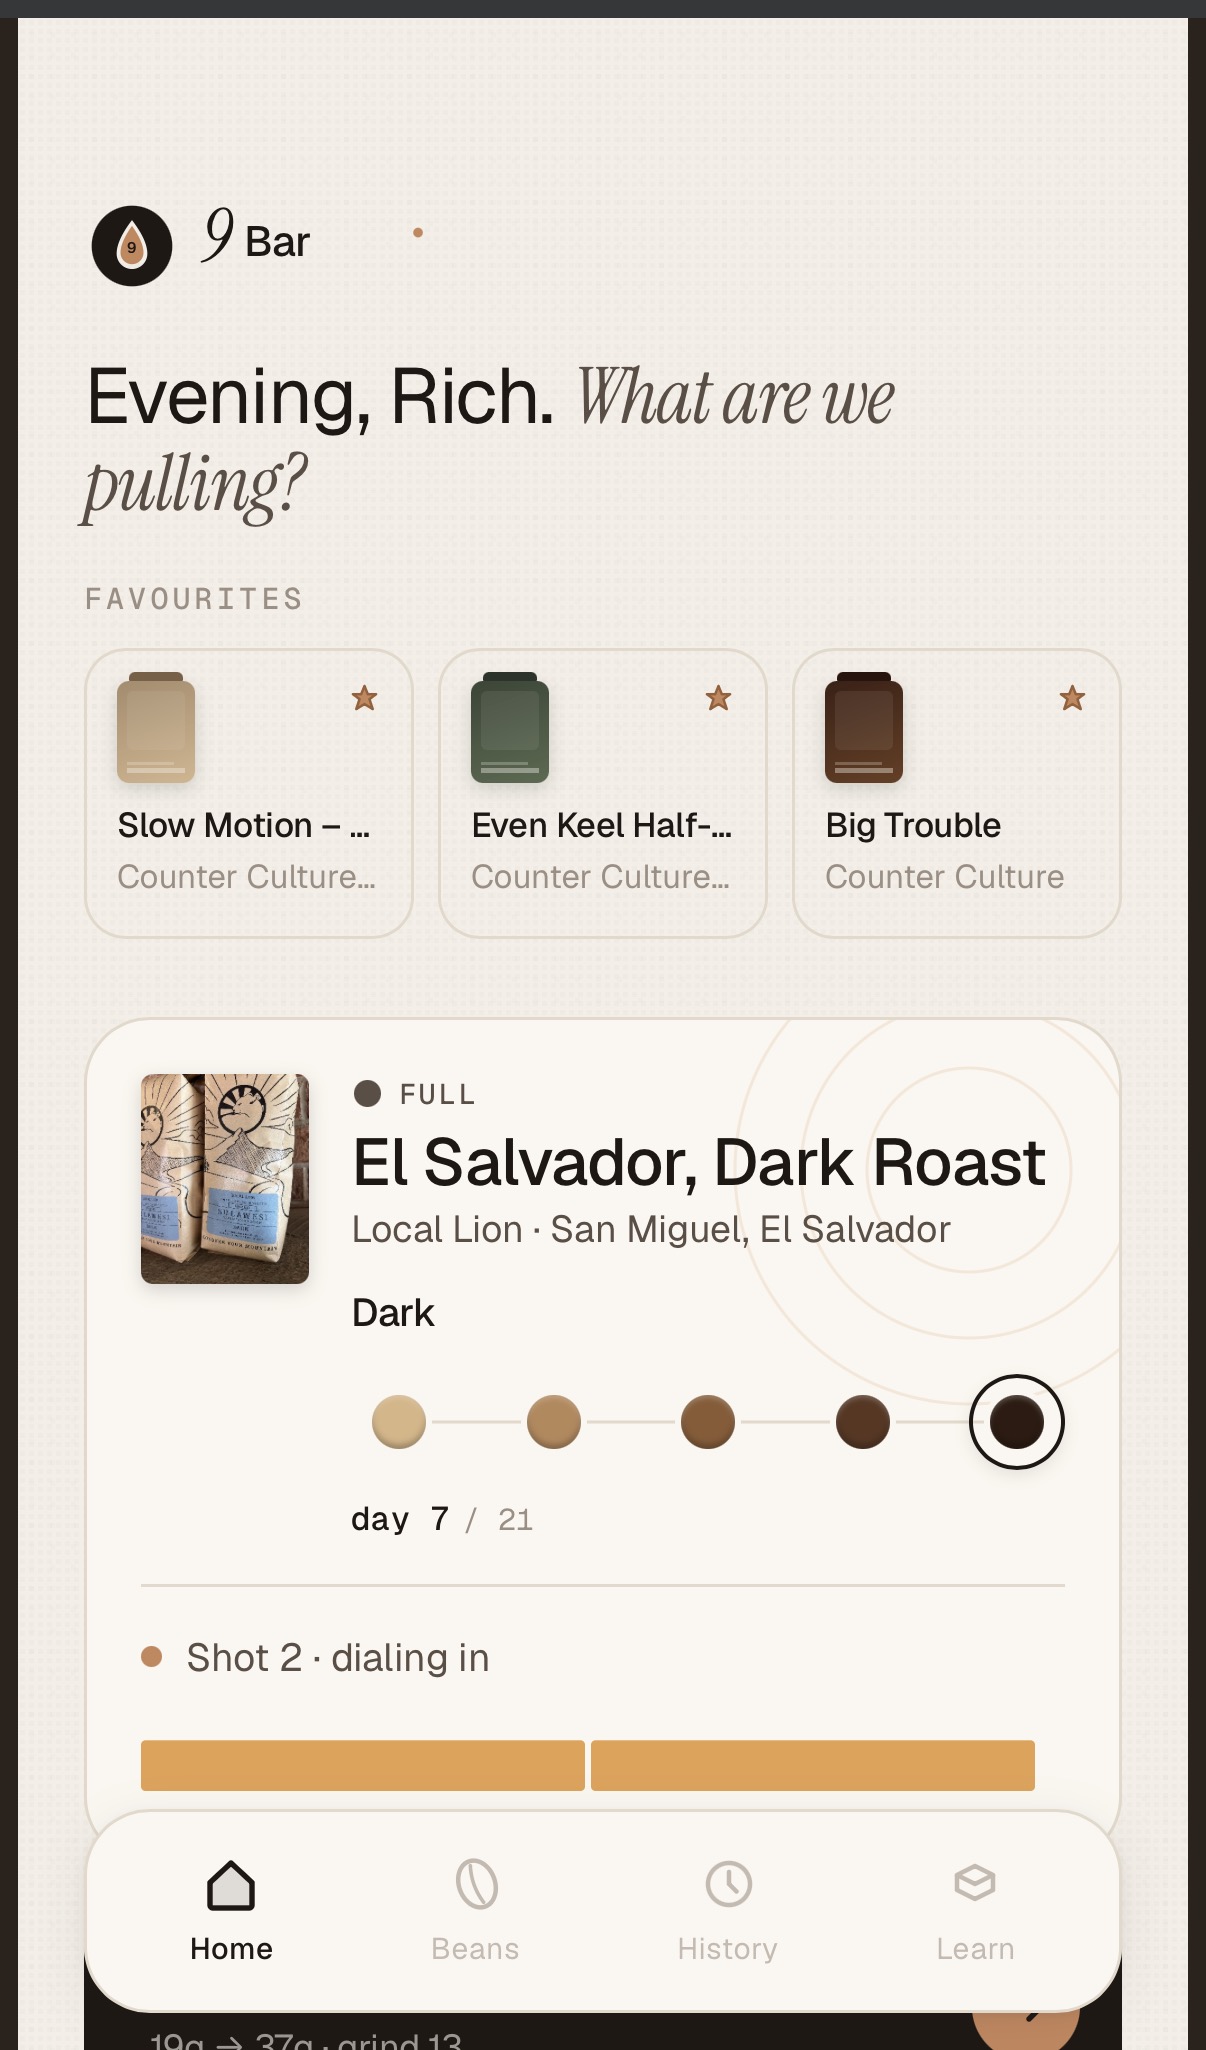
9Bar – your espresso co-pilot
At the start of the year I re-started my home espresso obsession having grown dissatisfied with the declining quality of Nespresso pods. This isn’t my first foray into home espresso and I’ve owned a range of machines over the years. I bought my self the entry level but pretty dependable Breville BES840XL and a one…